You're considering external wall insulation, so you're on the path to a more energy-efficient home. This upgrade slashes your energy bills by improving thermal retention, keeping your house cozy during the winter. You'll notice fewer cold spots and a more consistent indoor temperature. Plus, it reduces your carbon footprint and even offers soundproofing benefits for a quieter home. Installation involves prepping your walls, securing insulation boards, and finishing with a protective render. While costs vary, the long-term savings and improved comfort are worth it. Explore further to see how it transforms different properties and which materials might suit your needs best.
Benefits of External Wall Insulation
Table of Contents
ToggleExternal wall insulation acts like a cozy blanket for your home, offering numerous advantages that can enhance both comfort and efficiency.
First, you'll notice a significant reduction in your energy bills. By keeping the warmth inside during winter and the heat out in summer, your heating and cooling systems won't have to work as hard, leading to lower energy consumption. This not only saves you money but also reduces your carbon footprint, making your home more environmentally friendly.
Additionally, external wall insulation can dramatically improve your home's comfort level. With less heat escaping through the walls, you'll experience more consistent indoor temperatures, eliminating those pesky cold spots. This means no more shivering in the living room or sweating in the bedroom; your home stays comfortable year-round.
You'll also enjoy enhanced soundproofing. The added layers help block out external noise, creating a quieter, more peaceful living environment. This is especially beneficial if you live in a bustling urban area or near a busy road.
How It Works
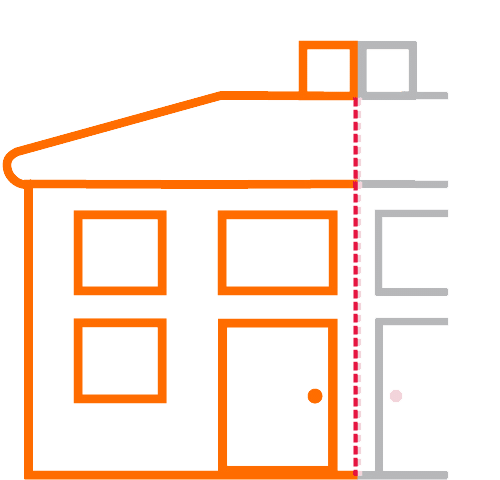
Now that you're aware of the benefits, let's explore how external wall insulation actually works. The process involves attaching an insulating layer to the exterior walls of your home, which is then covered with a protective finish. This system helps reduce heat loss, enhances weather resistance, and improves the aesthetic appeal of your property.
Here's a breakdown of how it all comes together:
- Preparation: The walls are cleaned and prepared, ensuring a smooth surface for the insulation to adhere to. Any existing cracks or damages are repaired.
- Insulation Layer: Insulation boards, typically made from materials like expanded polystyrene or mineral wool, are fixed to the exterior walls using adhesive or mechanical fixings.
- Reinforcement: A reinforcing mesh is applied over the insulation layer to provide additional stability and prevent cracking.
- Base Coat: A base coat is applied over the mesh to create a solid, even surface, ensuring the insulation is securely enclosed.
- Finishing Coat: Finally, a decorative finish, such as render or cladding, is applied to protect the insulation and enhance the appearance of your home.
Suitable Properties
When considering external wall insulation, it's essential to determine if your property is suitable for this upgrade. First, assess the type of walls your building has. Solid walls are ideal candidates, as they lack the cavity needed for traditional insulation.
Older properties, often built before the 1920s, typically have solid walls, making them perfect for external insulation. However, it can also be beneficial for cavity walls if they're poorly insulated or non-insulated.
Next, examine the external condition of your walls. Cracks, dampness, or structural issues should be addressed before installation. The insulation won't fix these problems and might even exacerbate them.
Check for planning restrictions, especially if your property is listed or in a conservation area. Some local authorities have regulations that may affect your ability to install external insulation.
Consider the available space around your home. External insulation adds thickness to your walls, so verify there's enough room to accommodate this without encroaching on boundaries or pathways.
Installation Process
Initiating the installation process for external wall insulation requires careful preparation and planning. You'll want to guarantee everything is in place for a smooth operation.
First, assess your walls for any repairs needed before you start. Cracks or damp issues can undermine the insulation. Next, choose the right insulation material based on your specific needs—this could be mineral wool, expanded polystyrene, or another suitable option.
Before diving into the installation, gather your tools and materials. You'll need adhesive, insulation boards, fixings, and a finishing render.
Here are some key steps to follow:
- Prepare the surface: Clean and dry the walls to guarantee the insulation adheres properly.
- Apply adhesive: Spread it evenly on the boards before fixing them to the wall.
- Secure the boards: Use mechanical fixings for added stability, especially in windy areas.
- Reinforce with mesh: Embed a fiberglass mesh into the base coat to prevent cracking.
- Finish with render: Apply a final coat to protect and beautify your new insulation.
Cost Considerations
How much should you budget for external wall insulation? You'll find that the cost can vary based on several factors, including the material used, the size of your home, and labor charges in your area.
On average, you might spend anywhere between $8,000 to $15,000 for a standard-sized home. However, this is a rough estimate and your actual costs could be higher or lower.
First, consider the material. Options like expanded polystyrene (EPS), mineral wool, or phenolic resin each come with their own price tags and benefits.
EPS might be more cost-effective, but mineral wool offers superior fire resistance—choose based on your priorities and budget constraints.
Next, account for labor. Professional installation guarantees quality and efficiency, but it's not cheap. Rates can vary, so getting multiple quotes is a wise move.
Also, remember to include potential costs for scaffolding, especially if your home is more than one story tall.
Lastly, think about additional expenses such as permits or other local requirements. These can add up, so it's smart to research beforehand.
Energy Efficiency Impact
Considering the costs, it's crucial to recognize the return on investment that external wall insulation offers through enhanced energy efficiency. By installing this insulation, you can drastically reduce heat loss from your home, leading to lower energy bills and a more comfortable living environment.
This improvement means that you're not just spending money, but investing in long-term savings and sustainability.
External wall insulation acts as a barrier, preventing heat from escaping during the winter and keeping your home cooler in the summer. This efficient thermal regulation reduces your reliance on heating and cooling systems, cutting down on energy consumption.
Plus, you'll contribute to a smaller carbon footprint by lowering the demand for fossil fuels.
Here's how external wall insulation can impact your home's energy efficiency:
- Reduced Heat Loss: Keeps warmth inside during cold months.
- Consistent Indoor Temperature: Minimizes temperature fluctuations.
- Lower Energy Bills: Decreases the need for heating and cooling.
- Enhanced Comfort: Creates a more stable indoor climate.
- Environmental Benefits: Reduces carbon emissions by lowering energy use.
Common Materials Used
When considering external wall insulation, several materials frequently come into play, each offering unique benefits. You might find yourself overwhelmed by the options, but don't worry—understanding their characteristics can simplify your decision.
Expanded Polystyrene (EPS) is a popular choice due to its affordability and thermal efficiency. It's lightweight and easy to handle during installation. Mineral Wool, on the other hand, offers excellent fire resistance and soundproofing, making it ideal if these are your top priorities. Polyurethane Foam is another option, known for its superior insulation properties, though it can be more expensive. Finally, Phenolic Resin is gaining traction for its thin profile and high thermal performance.
Here's a quick comparison of these materials:
| Material | Key Benefits |
|---|---|
| Expanded Polystyrene (EPS) | Affordable and efficient |
| Mineral Wool | Fire-resistant and soundproof |
| Polyurethane Foam | Superior insulation properties |
| Phenolic Resin | High performance, thin profile |
Consider what matters most to you—whether it's cost, fire resistance, or thermal efficiency. This table should help you weigh the pros and cons and choose the best material for your needs.
Maintenance and Longevity
Why should you think about maintenance and longevity when it comes to external wall insulation?
Simply put, proper care guarantees your investment remains effective and looks great for years. Failing to maintain it can lead to issues like moisture damage or reduced insulation performance over time.
Regular upkeep not only prolongs the lifespan of the insulation but also helps retain the aesthetic appeal of your property.
To keep your external wall insulation in top shape, consider these key maintenance tasks:
- Regular Inspections: Check for cracks or damage at least once a year to catch issues early.
- Cleaning: Wash the surface periodically to remove dirt and prevent mold growth.
- Sealant Checks: Confirm seals around windows and doors remain intact to prevent water ingress.
- Repainting: Refresh the render or paint every 5-10 years to protect against weathering.
- Repair Promptly: Address any damage immediately to prevent it from worsening.